One of the most difficulties side activities in Horizon Zero Dawn: The Frozen Wilds is Ikrie’s Challenge. If you are having a hard time beating this errand, you can check out our guide below for some tips.
Unlocking Ikrie’s Challenge
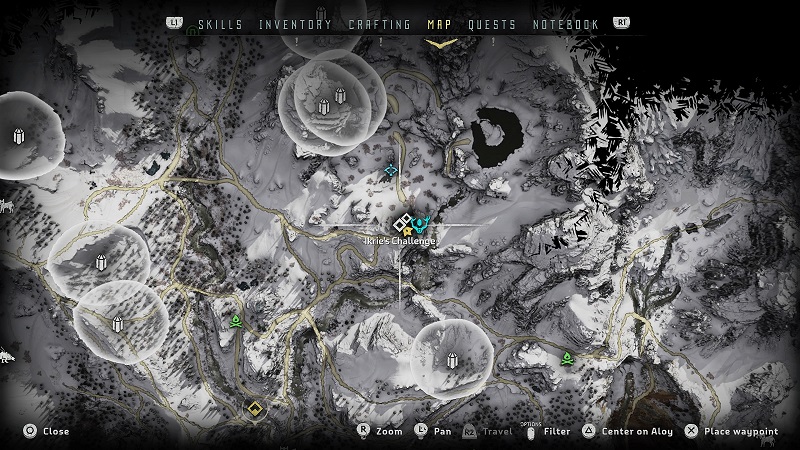
In order to unlock the challenge, you must first complete The Survivor side quest. Afterwards, Ikrie will show up in the Snowchants Hunting Ground located in the northern portion of The Cut DLC map.
Preparation
Before you begin the challenge, we highly recommend that you learn Concentration and Concentration + as both of these skills will let you slow down time so that you can get a better aim at the weak points of the machines. We also suggest getting the Double Shot and Triple Shot as these skill will let you shoot two or three arrows simultaneously at the same spot (you have to manually load multiple arrows using the R1 button while holding L2 to aim).
As for outfits, we recommend getting the Shield-Weaver from the main game if you haven’t done so already. With this armor equipped, you don’t have to worry about your health bar all that much. If you don’t have the Shield-Weaver, then equip the best damage limiting outfit you have and make sure to go into the challenge with a full medicinal pouch.
Overview
In Ikrie’s Challenge, you can only use a bow that will be given to you. The weapon comes with the following ammunition: 5 Fire Arrows, 30 Hunter Arrows and 25 Hardpoint Arrows.
The game won’t let you access the menu screen in this side quest. Thus, you won’t be able to change your armor and weapon. You can’t also craft (so you can’t get more arrows). While you can use your medicinal pouch (you can do so by pressing up in the directional pad), you can’t use any potions.
To be successful, you have to defeat ten machines with the arrows given to you. The fail states for this challenge are that either you die or completely run out of arrows.
You will be teaming up with Ikrie, who will be firing freeze bombs at any nearby enemies from here position.
Wave #1: 4 Scraper Machines
Now that you got the basics down, let’s begin your run. The first wave contains 4 Scraper Machines. Begin by aggroing one of them and then lure them to right under where Ikrie is located (you will see a giant Banuk painting on the ground).
Because you have limited arrows, you have to get the most out of every shot. For the Scrapers, first being by switching to the Hardpoint Arrow via the weapon wheel menu, which you can bring up by holding L1. Afterwards, load an extra arrow via the Double Shot skill, which will let you fire two at a time.
Wait for Ikrie to completely freeze one of the machines (you can tell that the enemies are frozen if you see a thick white outline surrounding the freeze symbol). Make sure that the scalpers is relatively still before going into concentration mode (which can be activated for a limited time by holding L2 to aim and then R3 to slow down time). Aim for the Radar, which is located to the top of its back (to make it easier, you can scan the target before hand with R3). You should be able to kill the machine with the Double Shot of Hardpoint Arrows. Rinse and repeat the process with the three remaining Scrappers to clear the first wave.
It is important that you save as much arrows as possible for the later rounds. For this reason, we recommend that you should be very patient with your shot selection as the Scrapers can be very elusive. Not to mention that they are quite annoying in a pack. Hopefully, you can clear this wave by using just 8 Hardpoint Arrows.
Wave #2: 3 Grazer Machines
The second wave is the easiest. To begin, change your ammunition to Hunter Arrows. Afterwards, use your Double Shot skill to load an extra arrow, giving you two for the next shot. Go aggro any of the 3 Grazer Machines that spawned on the arena and bring it to below Ikrie.
Once she completely freezes one of the machines, aim of the Blazer Canister on the back of the Grazer. You should be able to take one down with the with the Double Shot of Hunter Arrows. Do the same thing for the remaining two Grazers to complete this wave. If you follow are steps, then you will only need 6 Hunter Arrows in the second stage of the challenge.
Wave #3: 2 Trampler Machines
The next wave can really eat up your arrow count if you don’t how to exploit the weakness of the Trampler Machines. First off, make sure to switch the ammunition right back to Hardpoint Arrows and then use your Triple Shot Skill to load three arrows for the next shot. Afterwards, lure the Tramplers to Ikrie.
Once your partner complete freezes one of the machines, try to maneuver your way to its side so that you can have a clear shot of the Processing Unit located in its underbelly. If you have a clear shot, head into concentration mode and the shot the three Hardpoint Arrows that you already have in your equipped to your bow. Immediately afterwards, if possible, fire another Hard Point to the same area, which should result in the Processing Unit exploding (make sure you keep a safe distance), setting the machine on fire.
The burn effect will gradually reduce the health points of the machine until it gets destroyed; so you don’t have to fire any other arrows at the target. After taking down one of the Trampler, follow the same aforementioned procedure to defeat the other one. You will be in great shape for the last wave if you only use up 8 Hardpoint Arrows here.
Wave #4: 1 Fire Bellowback Machine
The last wave contains one Fire Bellowback Machine. To take it out, use your remaining Hardpoint Arrows at the Gullet and Cargo Sac parts. Destroying these components will deal massive damage to an otherwise beefy machine (the destructions will also set the machine ablaze although the fire damage won’t be that much). If you run out of Hardpoint Arrows, switch to Hunter Arrows and Fire Arrows to finish it off.
If you don’t think that you can kill the Fire Bellowback before running out of arrows, there is one last trick you can do. Located close to Ikrie is a container holding a bunch of wooden logs. You can try luring the machine to right under this container and then shoot of the metal scrap holding the log to deal massive damage. As long as you save up the ammunition in the three previous waves, as well as target the weak spots of the Fire Bellowback, then you shouldn’t need to do this.
By completing Ikrie’s Challenge the first time, you will unlock the Won Ikrie’s Challenge Trophy (Bronze) in Horizon Zero Dawn: The Frozen Wilds.